
Adding pay from before you started using Paycheq
If you start using Paycheq partway through the year, tell it what you’ve already earned and paid this year. That way CPP and EI stop at the yearly maximum at the right time, just as they do on your real cheques.
What you need
Your most recent pay stub before you started tracking in Paycheq, with its year-to-date (YTD) column.
Adding the amounts
- Open the Jobs tab and tap your job.
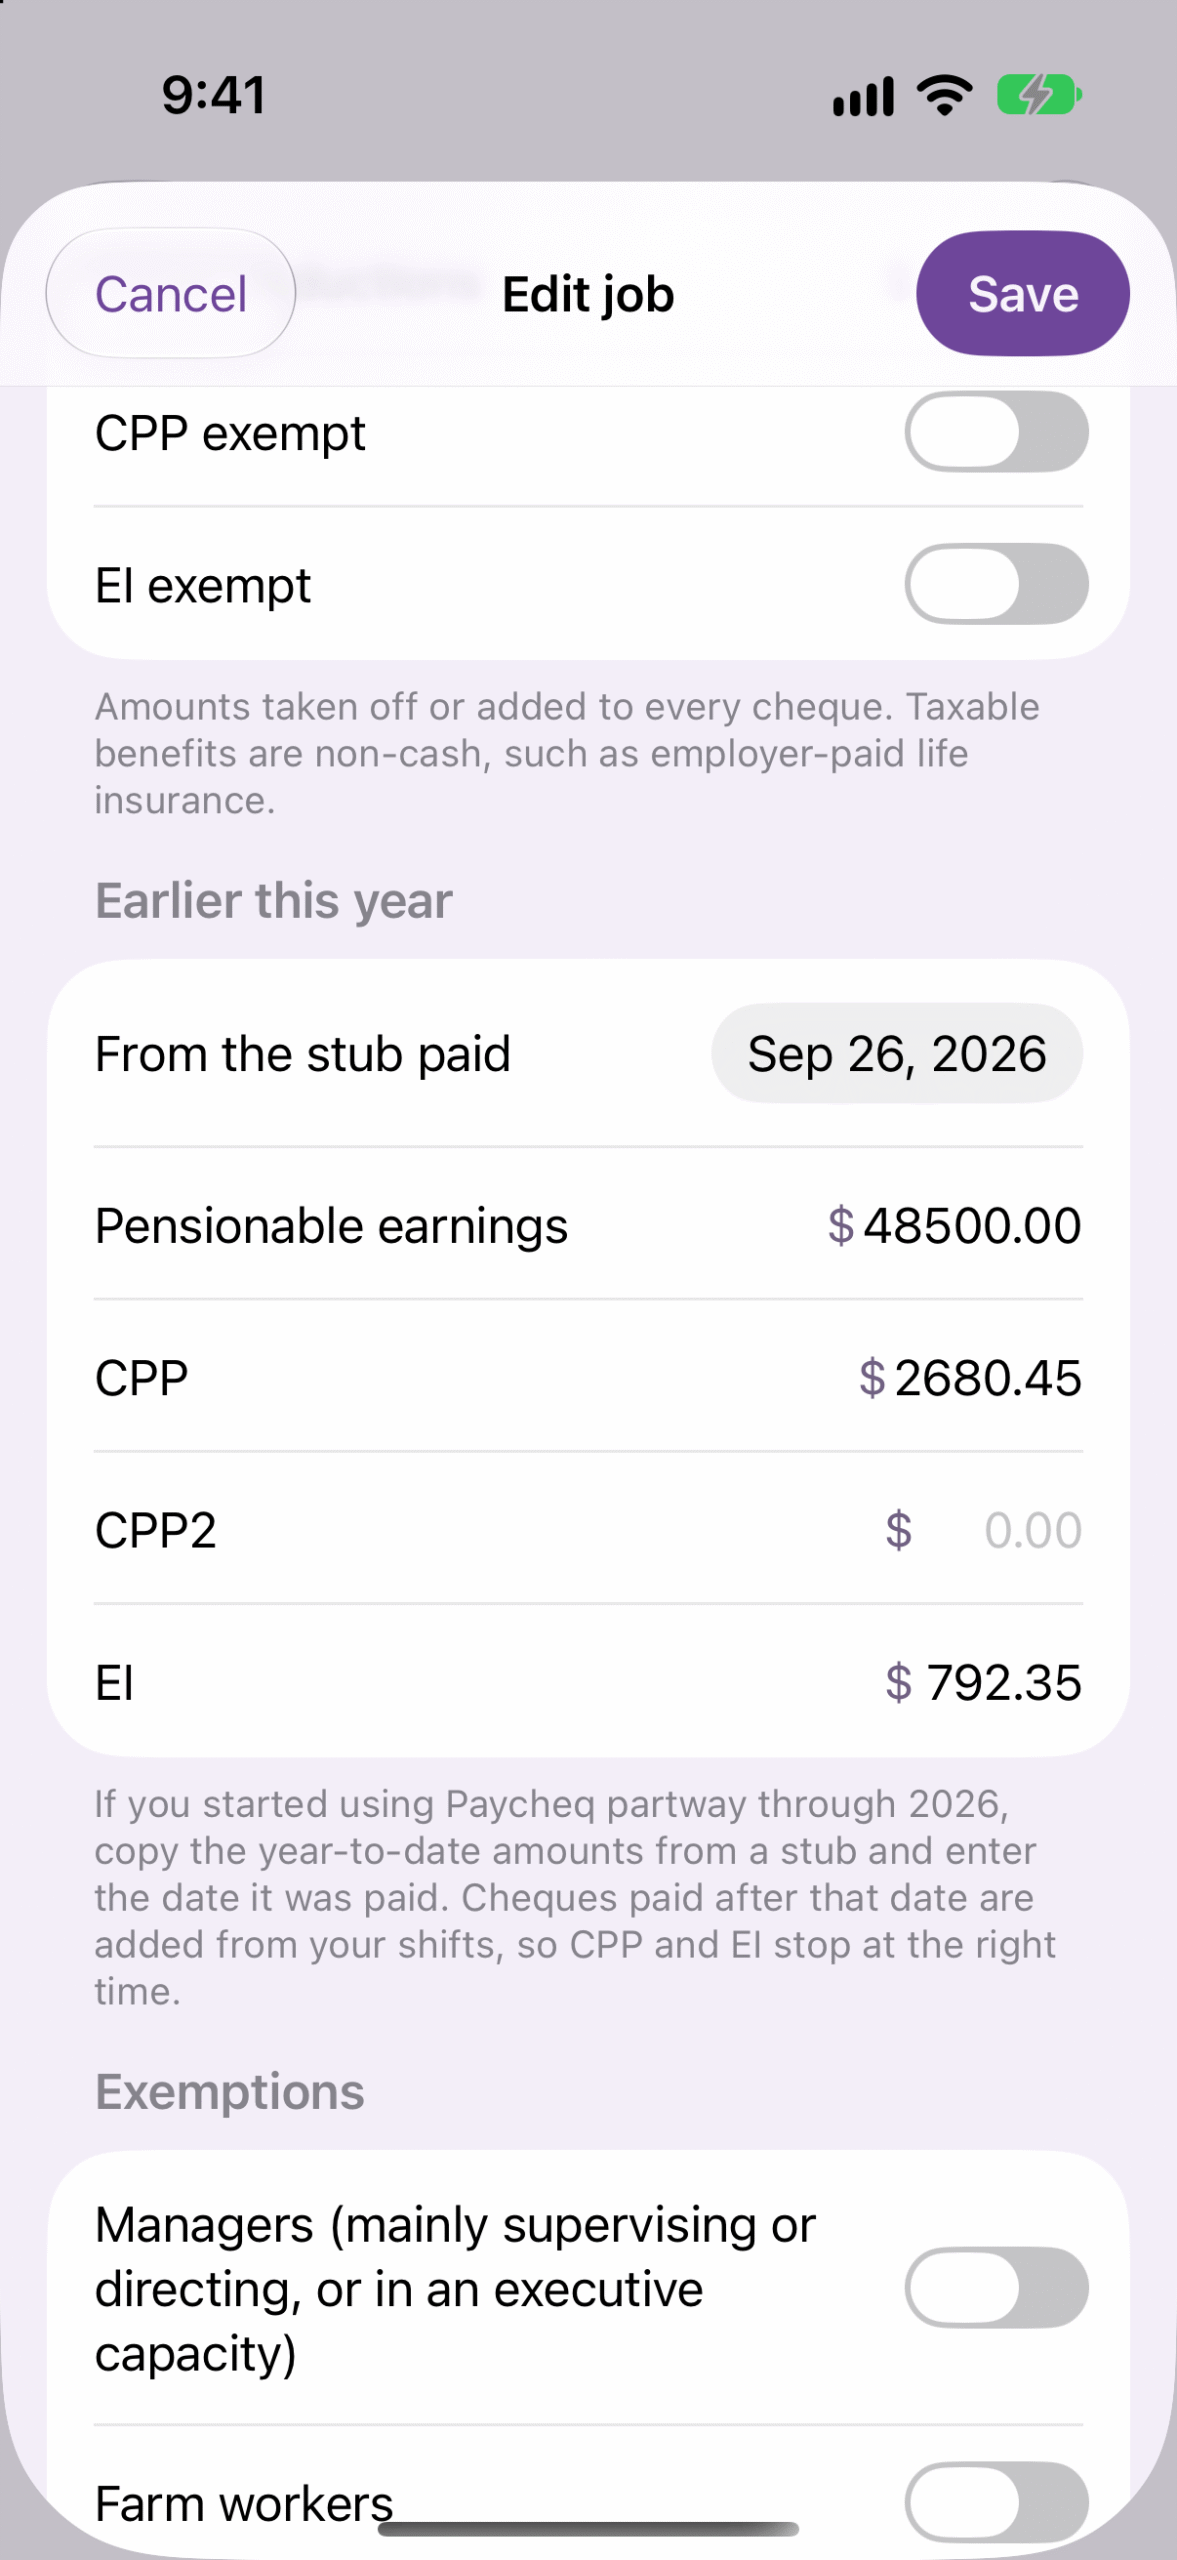
- Scroll to Earlier this year.
- Set From the stub paid to the pay date on that stub.
- Copy the year-to-date amounts:
- Pensionable earnings: often shown as CPP earnings or YTD gross.
- CPP, CPP2 and EI.
- Tap Save.
You can also enter these during setup, on the Earlier this year screen.
How it works
Cheques paid on or before that date are covered by the amounts you entered. Cheques paid after it are added from your shifts. The CPP and EI this year card on the Pay screen includes your amounts.
Good to know
- Each job keeps its own amounts, the way each employer does.
- Enter them once per year. Next January, CPP and EI start from zero again.
- If you’re paid at a flat tax percentage, this section doesn’t appear, because flat tax has no CPP or EI.
Estimates only. Not legal or tax advice.
- Next in Getting Started →Setting up your first job
- Next in Getting Started →Your pay schedule from your last cheque
- Next in Getting Started →Clocking in and out
- Next in Getting Started →Entering a shift by hand
- Next in Getting Started →Reading the Week screen
- Next in Getting Started →Clock-in and clock-out reminders
- Next in Getting Started →Working more than one job
- Next in Getting Started →Your widget and Live Activity
- Next in Getting Started →Checking your first cheque
- Next in Your pay →Reading the Pay screen
- Next in Your pay →Why your estimate can differ from your cheque
- Next in Your pay →Entering a cheque stub
- Next in Your pay →CPP and EI and the yearly maximums
- Next in Your pay →Adding pay from before you started using Paycheq
- Next in Your pay →Vacation pay
- Next in Your pay →Exporting shifts and pay summaries
- Next in Overtime and rates →The overtime window (such as midnight to 6 a.m.)
- Next in Overtime and rates →Saturday, Sunday and other day rates
- Next in Overtime and rates →Daily and weekly overtime
- Next in Overtime and rates →Shifts entered at 1.5× or 2×
- Next in Overtime and rates →The rate highlighted on the Clock card
- Next in Overtime and rates →Other rates, such as a lead rate
- Next in Overtime and rates →Raises and retro pay
- Next in Union contracts & custom rules →Setting up your contract rules
- Next in Union contracts & custom rules →The long-shift meal premium
- Next in Union contracts & custom rules →Call-out minimums
- Next in Union contracts & custom rules →How does banked time work?
- Next in Union contracts & custom rules →When more than one rule applies
- Next in Union contracts & custom rules →Working two rates in one shift
- Next in Union contracts & custom rules →Paid breaks and unpaid meal breaks
- Next in Union contracts & custom rules →Shift premiums and on-call pay
- Next in Holidays →How holiday pay works
- Next in Holidays →Your contract's own holidays
- Next in Holidays →How do my two vacation balances work?
- Next in Holidays →Holidays in Alberta
- Next in Holidays →Holidays in British Columbia
- Next in Holidays →Holidays in Manitoba
- Next in Holidays →Holidays in New Brunswick
- Next in Holidays →Holidays in Newfoundland and Labrador
- Next in Holidays →Holidays in the Northwest Territories
- Next in Holidays →Holidays in Nova Scotia
- Next in Holidays →Holidays in Nunavut
- Next in Holidays →Holidays in Ontario
- Next in Holidays →Holidays in Prince Edward Island
- Next in Holidays →Holidays in Saskatchewan
- Next in Holidays →Holidays in Yukon
- Next in Holidays →Holidays in the federal sector
- Next in Your data →Backing up and restoring
- Next in Your data →Using a flat tax percentage
- Next in Your data →Union dues
- Next in Your data →How Paycheq estimates tax
- Next in Your data →TD1 claim amounts
- Next in Your data →Your data stays on your phone
- Next in Paycheq Pro →What Paycheq Pro adds
- Next in Paycheq Pro →Restoring a purchase
- Next in Paycheq Pro →If your Pro subscription ends
- Next in Troubleshooting →My figures don't match my cheque
- Next in Troubleshooting →A backup won't restore